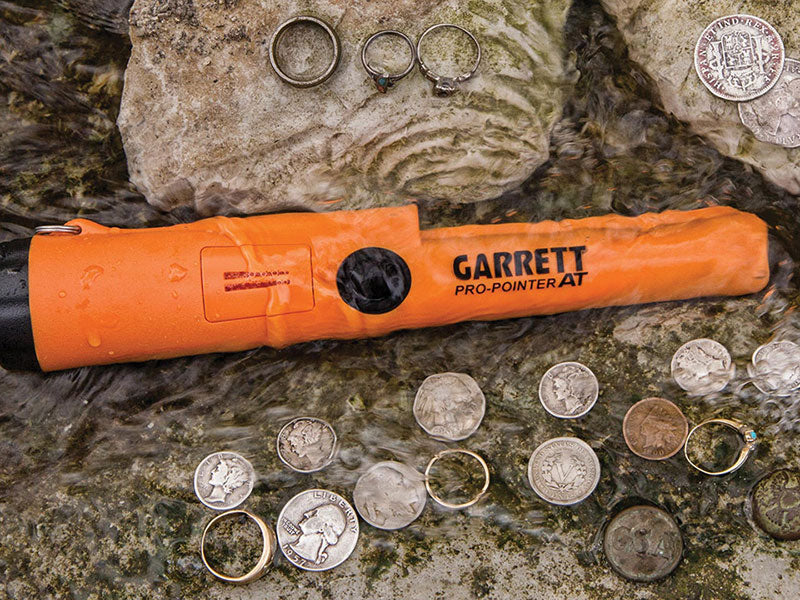
The Garrett Pro-Pointer AT or sometimes called the Garrett Carrot is a great, easy to use pinpointer. In the following getting started guide we'll explain the settings and configuration to get the most of your pinpointer.
Your Garrett Pro Pointer AT comes with a 9V battery already pre-installed and ready to use. We do recommend to keep an extra 9V battery on hand as the supplied battery is always only partially full. We found that the supplied battery will be empty quickly and the pinpointer will start behaving erratic, a new battery solves that problem immediately.
Powering On
Press and release the button () while holding the detector away from any metallic objects. You will hear 2 beeps and the LED () will remain on.
Powering Off
Press and hold the button for a half second until you hear a single beep (or single vibration in Silent Mode), indicating power down.
Changing Settings
The Garrett Pro Pointer AT has three Sensitivity settings and two detection settings: Audio-plus-Vibrate or Vibrate-only (silent).
To enter adjustment mode, press and hold the button () for 2 seconds—indicated by a single beep followed by a dual-tone beep and flashing LED. (Note: In Silent Mode, beeps are replaced by vibration pulses.)
The first button press after entering adjustment mode indicates the current setting. Repeatedly press the button to cycle through the 6 settings:
- 1 beep = minimum Sensitivity, with audio
- 2 beeps = medium Sensitivity, with audio (Default setting)
- 3 beeps = maximum Sensitivity, with audio
- 1 vibrate = minimum Sensitivity/Silent
- 2 vibrate = medium Sensitivity/Silent
- 3 vibrate = maximum Sensitivity/Silent
To exit adjustment mode, press and hold the button for 2 seconds - indicated by a dual-tone beep (dual vibrate in Silent Mode), or wait 5 seconds for automatic exit.
Notes:
- Lower Sensitivity settings are recommended to prevent detection of highly mineralized grounds.
- Detection remains operable during the adjustment mode.
- Settings will be remembered when the unit is switched off and back on.
Fast Retune for Mineralized Ground
To tune out the detection of saltwater, wet sand or highly mineralized ground, hold the tip of the Garrett Pro Pointer AT to the water, sand or soil and quick-press the button () for an instant Retune.
If necessary, repeat this Fast Retune to further eliminate any environmental response. Note: An alternate means of eliminating the ground response is to reduce Sensitivity.
Precisely Pinpointing Large Targets
Slowly scan toward the object until the response increases to full/constant alarm. Then quick-press the button to instantly retune and narrow the detection field. Continue scanning toward the object to find its precise location. Repeat this Fast Retune to further narrow detection field as needed.
Lost Pinpointer Alarm
After 5 minutes of being ON without a button press, the Garrett Pro Pointer AT will begin emitting progressively faster warning chirps for 60 minutes. Press the power button to reset.
Auto-Off Feature
After one hour of warning chirps, the Garrett Pro Pointer AT will power off automatically.
Scraping Blade
This rugged edge is ideal for sifting through dirt while searching for the target. The Garrett Pro Pointer AT's 360º-side-scan detection allows the detector to alarm when the blade is passed in close proximity to a metallic target.
Lanyard Attachment Clip
Use to attach the Garrett Pro Pointer AT to your belt, digging pouch or your detector (if desired).
Holster
Secure to any standard size belt. A metal snap within the holster will cause the pinpointer to alarm if put away while powered on.
Ruler
The Pro-Pointer AT has a ruler molded into its exterior to measure a target’s depth in either centimeters or inches.
Low Battery Alarm
When the battery becomes low, the detector will sound an alternating dual-tone alarm. Replace the 9V battery as soon as possible.
Battery Replacement
Simply rotate the battery cover counterclockwise to remove and clockwise to tighten by hand. To properly install the 9V battery, match the larger battery terminal to the larger opening in the compartment.
Remove the battery when the unit is to be stored more than 30 days.
Operational Information and Tips
- The operation is completely automatic. All metals will be detected including ferrous and non-ferrous.
- When a target is detected, the Pro-Pointer AT will produce an audio and/or vibration alert. The rate of the pulsing audio and vibrations increase proportionately as the pinpointer is moved closer to a metallic target.
- Maximum detection of very small targets is obtained against the side about ½” from the tip.
- To avoid canceling out a target, do not turn on the Pro-Pointer AT while it is adjacent to the target.
- Because the Garrett Pro Pointer AT is a static, non-motion detector, the optimum operation is achieved when the unit is switched off between uses.
- Avoid using the Garrett Pro Pointer AT as a digging or prying tool. It is designed for flat side-scanning and precise pinpointing with its tip. It is not intended to be used with excessive force.
- For water use, do not exceed 20 feet (6 meters) depth. Make sure the battery cap threads are free of sand, sediment, etc. and that O-ring is periodically lubricated with silicone grease to maintain a tight seal.
- To remove dried dirt, mud or other debris from the unit, simply hand wash it with soap, water, and a soft cloth. Do not use any type of abrasive or chemical cleaners that could scratch or erode its surface.
If you don't have a Garrett Pro-Pointer AT Pinpointer yet, take a look at our pinpointer bundles here.


0 comments