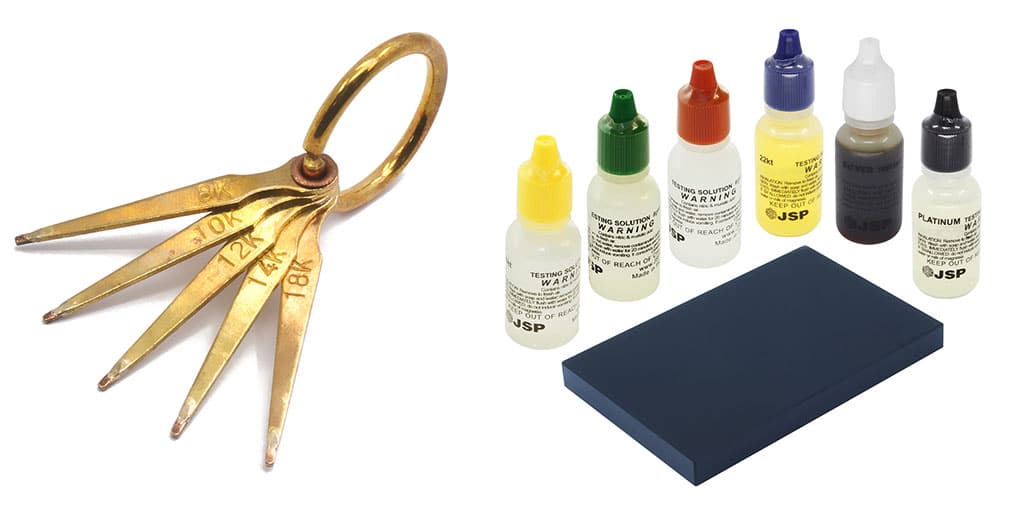
Testing for Gold
Scratch the piece to be tested over the surface of the black stone provided, press well so as to leave a visible deposit, preferably a line of one to one-half inches long. Please note: For the most accurate testing it is recommended that you become familiar with comparative testing using standard gold testing needles. For highest sensitivity place a scratch line with a gold test needle next to the scratch line of the metal you are testing. Compare the speed at which the scratches dissolve. If the test scratch dissolves more quickly than the needle scratch, it is a lower karat than the needle. Place a drop of the 10K solution to the scratch made. If the solution dissolves the scratch on the stone. it means the object is less than 10K gold or not gold at all. If the, solution leaves the scratch intact, it means the object being tested is 10K or greater than 10K. The scratching and testing is repeated with the 14K solution. If the Solution dissolves the scratch on the stone, it means the object is less than 14K gold (if the scratch dissolves slowly and leaves rusty color particles, it is probably 12k gold). If the solution leaves the scratch intact, it means the object being tested is 14K or greater than 14K.
Caution: Many objects are marked 14K, but were fabricated prior to 1982 when it was legal to mark items 14K, but, in reality, the gold was 13.5K. When testing 13.5K gold, the 14K solution will not dissolve the scratch, but it will make it lose its brightness and it will turn it into a yellow-rusty color. The scratching and testing is repeated with the 18K solution and the 22K solution (if available) until the karat of the object is determined. Remember that when the solution being used dissolves the scratch slowly and leaves rusty color particles it is probably two karats lower than the solution being used. On items of heavy weight and volume such as chains, coins, etc, where plating could hide the true metal, it is recommended that a deep notch in the test piece be made and the testing be made with the metal inside the piece..
Testing for Silver
Scratch the piece to be tested over the surface of the black stone provided. Press well so as to leave a LARGE AND THICK visible deposit, preferably a line of one to one-half inches long. Place a drop of the RED silver solution to the scratch made. The color reaction of the solution with the metal scratch will be as follows: (Take into consideration that the background of the test stone is black).
- Results
- The test solution should yield the following colors for each metal:
- Fine Silver (.999) = Bright Red
- Silver 925 = Dark Red
- Silver 800 = Brown
- Silver 500 = Green
Note: With the silver solution, it is possible to test directly on the piece being tested, however, the solution will dull the polishing of the piece, and leave a mark where the acid was placed..
Testing for Platinum and White Gold
Scratch the piece to be tested over the surface of the black stone provided, press well so as to leave a large and thick visible deposit, preferably a line of one to one-half inches long. Transfer a drop of the platinum test solution to the scratch made. Take into consideration that the background of the test stone is black. Observe the color of the material. Platinum test liquid can also be used for 18k and 14K white gold. If the material on the stone is platinum, it should keep its white, bright color. In the case of 18K, the material on the stone should start changing to a light bronze color in about 3 minutes. In the case of 14K white gold, the material on the stone should disappear in about 15 seconds.


0 comments